


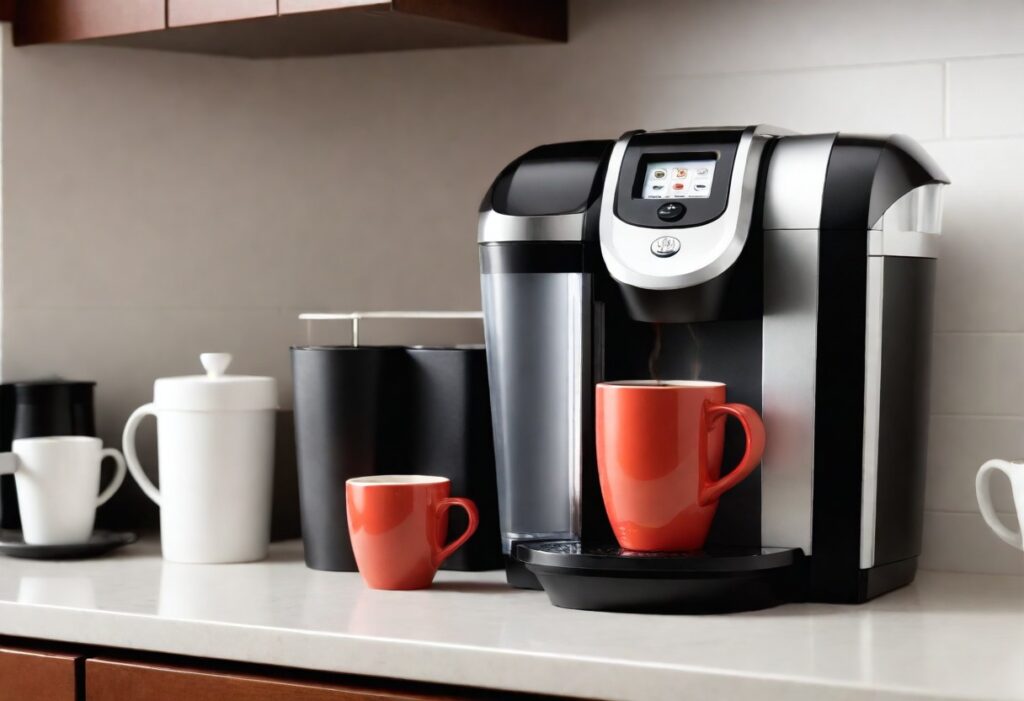
Why Your Keurig Is So Loud? The main reason your Keurig is making a lot of noise is due to the powerful water pump inside the machine. This pump is responsible for pushing water through the K-Cup and into your mug. Over time, the pump can become louder due to wear and tear or debris buildup.
In this article, we’ll explore the reasons behind your Keurig’s noisy behavior and offer practical solutions to bring back the serenity to your caffeine ritual. Let’s explore! ☕
Key Takeaways
- Regular descaling and cleaning are crucial for preventing buildup that can affect both the performance and taste of your Keurig coffee.
- Common issues such as inconsistent brewing volumes and odd noises often stem from pump problems or debris, which can be addressed with a manual reset or thorough cleaning.
- Ignoring maintenance can lead to health risks, as dirty coffee machines are breeding grounds for mold and bacteria; a step-by-step cleaning guide ensures safety.
- Leaving coffee pods in the machine for extended periods can negatively impact the machine’s functionality, and choosing the right descaling solution is vital for maintenance.
- Material quality and design flaws, such as the use of thin plastics or defective carafes, can contribute to the loudness and leakage problems experienced by Keurig users.
Why Keurig Coffee Makers Can Be So Loud?
Keurig coffee makers can be loud for several reasons. Let’s explore some of the possible causes and solutions:
- Type of Model: Older versions of Keurig machines may not have quiet brew technology, resulting in more noise during operation.
- Mineral Deposits: Over time, mineral deposits (such as calcium and salt) can accumulate inside the machine. These deposits can cause clogs and affect the water flow, leading to increased noise.
- Lack of Maintenance: Regular maintenance is essential for keeping your Keurig quiet. If you haven’t cleaned your machine or descaled it recently, it might be louder than usual.
- Surface Placement: The surface on which your Keurig sits matters. If it’s on a hard or uneven surface, vibrations and rattling sounds may occur. Placing it on a flat, stable surface can help reduce noise.
- Loose Parts: Clicking sounds may indicate loose parts. Check the water reservoir container, lid, and other movable components. Ensure everything is secure and properly fitted.
Remember, diagnosing the specific noise and addressing it will determine the necessary steps. Sometimes a simple adjustment can make your Keurig quieter, while other times it might require more thorough troubleshooting.
Read Also: Why Did My Keurig Stop Working After Descaling
The Importance of Regular Cleaning and Descaling
How Buildup Affects Your Keurig’s Performance
Over time, your Keurig coffee machine can accumulate mineral deposits from water, which can lead to a variety of issues. The buildup can restrict water flow, causing your machine to work harder and become louder during operation. This can also result in longer brewing times and inconsistent coffee temperatures.
The consequences of not descaling a Keurig coffee machine are significant:
- Altered taste of coffee: The mineral deposits can affect the taste of the brewed coffee, making it more bitter or off-flavor.
- Reduced efficiency: Buildup can cause your Keurig to consume more energy and potentially shorten its lifespan.
Regular descaling removes these deposits, ensuring that your coffee tastes as intended and that your machine operates quietly and efficiently. Keurig officially recommends descaling quarterly, but you may need to do it more often depending on the hardness of your water.
Quarterly Cleaning: Keurig’s Official Recommendation
Keurig’s commitment to quality coffee experiences extends to the maintenance of its machines. Regular descaling is crucial to prevent buildup that can affect both performance and taste. Keurig officially recommends a thorough cleaning every three months to ensure your brewer operates at its best.
To start, perform a full rinse of the machine to remove loose debris and coffee grounds. This can be followed by a more detailed cleaning process, which includes:
- Wiping down the exterior with a warm, damp cloth
- Washing the drip tray and any removable parts
- Cleaning the pod holder to prevent clogging
Using the Keurig 3-Month Brewer Maintenance Kit can simplify this process, providing all the necessary tools for regular upkeep. Ensuring fresh water is used daily also contributes to better-tasting coffee and a healthier machine.
The Descaling Process: Ensuring Optimal Taste
Descaling your Keurig is a critical step in maintaining the machine’s performance and ensuring the best possible taste for your coffee. Over time, calcium and other minerals can build up in the machine’s internal components, leading to inefficiencies and a less-than-ideal flavor profile.
Using a descaling solution, whether it’s vinegar or a Keurig-branded product, helps to remove these deposits.
After descaling, it’s essential to run plain water through the system several times. This helps to rinse away any residual descaling solution and prevents any unwanted flavors from affecting your coffee.
The process is straightforward:
- Fill the reservoir with the descaling solution.
- Run the brew cycle until the reservoir is empty.
- Refill the reservoir with fresh water and repeat the brew cycle until the water runs clear.
By following these steps, you can keep your Keurig operating smoothly and your coffee tasting great.
Read Also: How to Descale Keurig K Supreme Plus with Vinegar
Troubleshooting Common Noises and Issues

Identifying the Source: Pump Problems or Debris
When your Keurig starts making unusual noises, it’s crucial to determine whether the issue is with the pump or caused by debris. A whining or thudding noise often indicates a pump problem, which can be exacerbated by scale buildup or mechanical failure.
On the other hand, debris in the line can obstruct water flow, leading to incomplete brewing cycles and inconsistent dispensed water volumes.
To troubleshoot these issues, follow these steps:
- Check for misalignment of parts such as the coffee pot, lid, filter, and filter cover. Ensure they are correctly positioned as safety settings may prevent brewing.
- Verify that the machine is filled with clean water and not empty.
- If the descale warning light persists, consider running a descaling cycle with Keurig’s solution or vinegar to remove any scale buildup.
- For clogged lines, a manual reset sequence may help, but if problems persist, professional servicing may be required.
The Manual Reset Sequence for Persistent Problems
When your Keurig coffee maker continues to act up despite all troubleshooting efforts, a manual reset may be in order. This sequence can often resolve issues such as unresponsive descale lights or inconsistent brewing cycles. To initiate the reset, ensure your Keirug is powered on.
Follow these steps to manually reset your Keurig:
- Press and hold the 8 cup and 10 cup selection buttons simultaneously.
- Maintain the hold for approximately 5 seconds or until you notice a response from the machine.
Many users have reported immediate results after performing this reset, indicating its effectiveness in resolving certain malfunctions. If the problem persists, further investigation into the pump or potential debris may be necessary.
Inconsistent Brewing Volumes and Potential Solutions
Inconsistent brewing volumes can be a sign of a clogged water line or a malfunctioning pump. Regular maintenance is crucial to prevent these issues. If you notice your Keurig is not dispensing the correct amount of water, here are some steps you can take:
- Ensure the water reservoir is properly seated and filled to the desired level.
- Perform a cleansing brew without a coffee pod to clear out any potential debris.
- Check for and remove any visible obstructions in the water line or pod holder.
If these steps do not resolve the issue, it may be necessary to descale your Keurig. Mineral buildup can restrict water flow and affect the volume of your brew. Follow the manufacturer’s instructions for descaling, using either a vinegar solution or a descaling agent. If problems persist after descaling, consider contacting Keurig customer service for further assistance or to explore warranty options.
See Also: Keurig Not Working After Cleaning with Vinegar
Maintaining Your Keurig for Health and Safety

The Risks of a Dirty Coffee Machine
Neglecting the cleanliness of your Keurig can lead to more than just an unpleasant taste in your morning cup. A dirty coffee machine is a haven for mold and bacteria, which can pose serious health risks. Regular cleaning prevents the buildup of these harmful organisms and ensures that your coffee remains safe to drink.
The performance of your Keurig is also compromised by neglect. Residue and mineral deposits from water can clog the machine’s inner workings, leading to inefficiency and a shorter lifespan.
To maintain both the quality of your coffee and the longevity of your machine, consider the following steps:
- Rinse the water reservoir daily to keep your coffee tasting fresh.
- Clean the coffee carafe and basket regularly, especially if you use a K-Duo coffee pot.
- Don’t forget to clean the pod holder to remove coffee grounds and stains.
- Perform a full rinse of the machine to eliminate any lingering debris.
By adhering to these simple maintenance tasks, you can enjoy delicious, mold-free coffee and extend the life of your Keurig.
Step-by-Step Guide to Cleaning Your Keurig
Keeping your Keurig clean is essential for both taste and health. Start by unplugging the machine to ensure safety before any cleaning procedure.
Here’s a simple guide to help you through the process:
- Wipe down the exterior: Use a warm, damp cloth to clean the outside of your Keurig. This step can easily become part of your daily routine.
- Rinse and scrub: Rinse the machine with water, paying extra attention to any visible stains or coffee grounds. If necessary, use a soft brush to gently scrub away any residue.
- Clean the drip tray: Remove and wash the drip tray separately, ensuring that no coffee or water deposits are left behind.
- Perform a descaling cycle: Regular descaling removes buildup and is crucial for the machine’s performance. Follow Keurig’s instructions for this quarterly maintenance task.
After these steps, your Keurig should be ready to brew fresh, delicious coffee without the unwanted noise or health risks associated with a dirty machine.
Preventing Mold and Bacteria in Your Coffee Maker
Ensuring your Keurig remains a safe and clean appliance requires vigilance against mold and bacteria. After each use, it’s beneficial to leave the lid open, promoting air circulation and complete drying of the interior. This simple habit can significantly reduce the risk of unwanted microbial growth.
Regularly removing used coffee pods after they’ve cooled is also crucial. Not only does this prevent the stale taste of old coffee, but it also thwarts mold formation in the pod holder. Spills and drips should be addressed promptly to maintain a hygienic environment.
For those with a K-Duo coffee pot, remember to wash the carafe and basket regularly. Whether by hand or in the dishwasher, keeping these components clean is essential for both taste and health.
Lastly, replacing the water in your Keurig with fresh, cold water daily will not only improve the flavor of your coffee but also discourage bacterial growth.
Read Also: Keurig Descale Reset
Optimizing the Use of Coffee Pods
The Impact of Leaving Coffee Pods in the Machine
Leaving used coffee pods in your Keurig not only invites unpleasant odors but also poses a risk to the machine’s hygiene. Mold and bacteria can thrive in the moist environment of a used pod, potentially affecting the taste of your coffee and your health.
To maintain a clean and efficient machine, it’s crucial to remove the pods after they’ve cooled.
Here are a few simple steps to ensure your Keurig remains in top condition:
- Remove and discard the used coffee pod immediately after brewing.
- Wipe down the pod holder to remove any residual coffee grounds or liquid.
- Perform a quick inspection of the pod holder and surrounding area for cleanliness.
By following these practices, you can prevent the buildup of mold and ensure that each cup of coffee is as fresh and delicious as possible.
Choosing Between Vinegar and Keurig’s Descaling Solution
When it comes to descaling your Keurig, you’re faced with a choice: the DIY route with a vinegar and water solution or the branded Keurig descaling solution. Each option has its merits.
- Vinegar, a kitchen staple, is an effective descaler and is readily available. It’s a natural and cost-effective method, but it may leave a residual taste if not thoroughly rinsed.
- Keurig’s descaling solution is specifically formulated for their machines, potentially offering a more thorough clean. However, it is a more expensive option compared to vinegar.
Regardless of your choice, ensure you run several cycles of plain water through your Keurig afterward. This helps to remove any lingering taste and ensures your next cup of coffee is as fresh as possible.
Ensuring Proper Functionality with Regular Maintenance
To ensure your Keurig continues to operate efficiently and quietly, regular maintenance is crucial. Adhering to a consistent cleaning schedule can prevent the buildup of minerals and coffee oils, which are often the culprits behind excessive noise and other brewing issues.
- Begin by emptying the water reservoir and removing any coffee pods after each use.
- Perform a deep cleaning with a vinegar and water solution every 1 to 3 months, depending on the hardness of your water.
- Check for any misalignment of parts or visible wear and tear that could affect the machine’s performance.
By following these simple steps, you can maintain the longevity of your Keurig and enjoy a quieter, more reliable brewing experience.
See Also: Keurig Descale Light Won’t Turn Off
Material Quality and Design Flaws
Comparing Plastic Quality in Keurig Models
When selecting a Keurig coffee maker, the quality of the materials can significantly impact both the durability and the aesthetic appeal of the machine. Many users have reported a noticeable difference in the plastic quality between various Keurig models.
Some models are made from thicker, more substantial plastic, while others feel thin and brittle, raising concerns about longevity and robustness.
Key factors to consider when comparing plastic quality include:
- The thickness and weight of the plastic
- The texture and finish of the surfaces
- Resistance to cracks and breakage
Despite some models receiving criticism for their cheaper plastic construction, customer satisfaction remains high for many Keurig machines.
Reviews often highlight the functionality and improvements in design, such as the option for a stronger brew or a smaller carafe size. However, it’s important to weigh these features against the material quality to ensure you’re making a well-rounded decision.
Addressing the Leakage Issue with Full Pots
Many Keurig users have encountered a common issue: the coffee pot leaks when pouring a full pot. This can be frustrating and lead to wasted coffee. The leakage often occurs when the plastic top meets the glass of the carafe. A potential solution is to replace the carafe with one that has an all-glass spout, which seems to fit better and prevent leaks.
If you’re experiencing this problem, consider the following steps:
- Check if the carafe is correctly aligned with the coffee maker.
- Ensure that the lid is securely fastened and there are no obstructions.
- Look for cracks or damage in the carafe that might cause leakage.
- If the issue persists, contact Keurig customer service for a possible replacement, as some users have reported receiving a new, non-leaking pot promptly and free of charge.
Considering Durability in Your Next Coffee Maker Purchase
When selecting a new coffee maker, durability should be a top consideration. A robust machine can withstand daily use and maintain its performance over time. Reviews often highlight the build quality of coffee makers, with some users noting the solidity and reliability of their machines.
Conversely, others express concerns over the use of thin, brittle plastics that may not endure the rigors of frequent brewing.
- Look for models with positive feedback regarding material quality and design.
- Assess the weight and feel of the machine; a heavier build often suggests better durability.
- Check for a warranty or guarantee that reflects the manufacturer’s confidence in their product.
Ultimately, investing in a durable coffee maker can lead to fewer replacements, better reliability, and consistent coffee quality. It’s worth considering models known for their solid construction, even if they come at a higher initial cost.
Read Also: Keurig K Supreme Descale Reset
Conclusion
In conclusion, the noise from your Keurig machine can often be attributed to a lack of regular maintenance and cleaning. Descaling and rinsing your Keurig are crucial steps in preserving its functionality and ensuring a quieter operation.
Buildup from water minerals and coffee grounds can lead to a louder brewing process, as well as potentially damaging the pump or causing blockages in the line.
Moreover, neglecting to clean your machine can result in not only noise issues but also inconsistent coffee volumes and a breeding ground for mold and bacteria.
To enjoy a smooth, quiet brewing experience and a perfect cup of coffee every time, it’s essential to follow Keurig’s maintenance recommendations and address any issues promptly.
Whether you choose to use a vinegar solution or Keurig’s own descaling solution, taking the time to clean your Keurig will pay off in the long run, both in the quality of your coffee and the longevity of your machine.
Frequently Asked Questions
How often should I descale my Keurig?
Keurig officially recommends descaling your coffee maker quarterly to remove buildup and ensure optimal taste.
Can I use vinegar to descale my Keurig?
Yes, you can use a mixture of one part vinegar and one part water to descale your Keurig or opt for Keurig’s own descaling solution.
What should I do if my Keurig is making loud noises?
Loud noises may indicate a problem with the pump or debris in the line. Try descaling your Keurig, and if the issue persists, consult the manual reset sequence.
Why is my Keurig brewing inconsistent volumes of coffee?
Inconsistent brewing volumes can be due to a variety of issues. Contacting Keurig support or performing a manual reset may help resolve the problem.
Is it important to clean the coffee pods area of my Keurig?
Yes, leaving coffee pods in the machine for extended periods can lead to mold and bacteria growth. It’s best to remove them after each use.
Why does my Keurig feel like it’s made of cheap plastic?
Some users have reported that certain Keurig models feel like they’re made from thinner, less durable plastic. It’s important to compare materials when considering a purchase.