


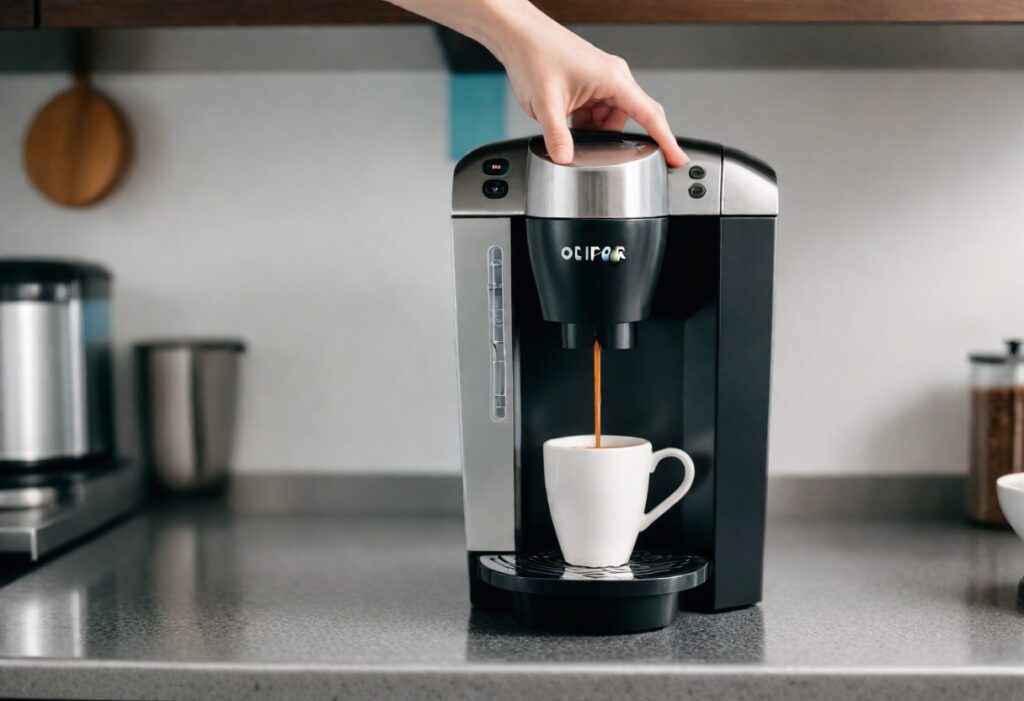
Maintaining your Keurig coffee machine involves regular cleaning and descaling to ensure it operates efficiently. An essential part of this maintenance is removing and cleaning the pod holder, which can become clogged with coffee grounds and affect the performance of your machine.
In this guide, we’ll walk you through the simple steps to remove it effortlessly. Whether you’re cleaning, repairing, or customizing your Keurig, our straightforward instructions will have you covered. Let’s explore and make your coffee experience smoother!
Key Takeaways
- Before removing the pod holder, always turn off and unplug the Keurig, and allow it to cool to avoid any potential hazards.
- Detaching the pod holder involves opening the Keurig’s head, releasing the holder, and separating it from the funnel.
- Cleaning the pod holder should include rinsing with warm water, using a paperclip to clean the needles, and drying thoroughly.
- After cleaning, reassemble by reattaching the funnel and pod holder, and perform a water-only brew cycle to ensure proper functioning.
- Maintain optimal performance by removing used pods after each brew, descaling regularly, and inspecting and cleaning the needles periodically.
Preparing to Remove the Pod Holder
Ensure the Keurig is Turned Off and Unplugged
Before you begin the process of removing the pod holder from your Keurig, it’s crucial to ensure that the machine is turned off. Disconnect the power cord from the outlet to prevent any electrical hazards or accidental activation of the brewing mechanism while you’re working on the machine.
After unplugging, it’s important to let the Keurig sit for a few minutes. This waiting period allows any residual heat within the machine to dissipate, making it safer to handle the internal components, including the pod holder.
- Turn off the Keurig machine.
- Unplug the power cord from the electrical outlet.
- Wait for the machine to cool down before proceeding.
Allow the Machine to Cool
After ensuring that your Keurig machine is turned off and unplugged, it’s crucial to allow the machine to cool down before attempting to remove the pod holder. This is not only for your safety but also to prevent any damage to the machine or its components due to heat.
- Wait for the machine to reach room temperature.
- Avoid touching any metal parts that could retain heat longer than plastic components.
Once the machine has cooled, you can proceed with confidence, knowing that you can handle all parts of the Keurig without the risk of burns or heat-related damage. You can do this by grabbing the rim of the assembly and gently pulling it out. This step is essential to ensure a safe and effective cleaning process.
Gather Necessary Cleaning Tools
Before you begin the cleaning process, it’s important to have all the necessary tools at hand. Ensure you have a non-abrasive cloth and mild dish soap to avoid damaging your Keurig.
For a more thorough clean, consider using specialized needle cleaning tools compatible with your Keurig model, such as the 2 Pack Needle Cleaning Tools. These can help remove coffee grounds that may be left behind after brewing.
Here’s a quick checklist of items you’ll need:
- Non-abrasive cloth
- Mild dish soap
- Needle cleaning tool (optional but recommended)
- Large ceramic mug (for water-only brew cycle)
Having these items ready will streamline the cleaning process and prevent any unnecessary interruptions.
Read Also: Why Your Keurig Is Shutting Off While Brewing
Detaching the Pod Holder

Open the Keurig’s Head to Access the Holder
To access the pod holder, lift the handle of your Keurig to open the head of the machine. This will expose the pod holder where the K-Cup is placed during brewing. Ensure that the handle is lifted completely to avoid any hindrance while removing the pod holder.
Once the head is open, you will see the pod holder assembly. It typically consists of two parts: the pod holder itself and the funnel that is attached to it. These parts are designed to be easily detachable for cleaning and maintenance purposes. You may read the guide on Do You Need a Water Filter for a Keurig
Release the Pod Holder from the Housing
Once you have opened the Keurig’s head, you will see the pod holder nestled inside. To release it, grasp the top of the holder with one hand while you use the other to gently push up from the bottom. Be careful not to use excessive force, as this could damage the holder or the machine itself.
After the initial push, the pod holder should come loose from the housing. If it seems stuck, check for any tabs or clips that might be securing it in place. These will typically need to be pressed or slid to allow the holder to be freed.
Here’s a simple breakdown of the steps:
- Grasp the top of the pod holder.
- Gently push up from the bottom with your other hand.
- Check for and disengage any securing tabs or clips.
- Lift the pod holder out of the housing.
Once removed, you can proceed to separate the pod holder from the funnel, which is the next step in the cleaning process.
Separate the Pod Holder and the Funnel
Once you have released the pod holder from its housing, it’s time to separate the pod holder and the funnel. This step is crucial for a thorough cleaning, as coffee grounds and debris can accumulate between these parts.
- Gently pull the funnel away from the pod holder. It should come off with minimal effort.
- Inspect the exit needle located on the inside bottom of the pod holder for any obstructions.
After separating the two components, you can proceed to clean them individually, ensuring that all coffee residue is removed.
Read Also: How to Descale Keurig K Supreme Plus with Vinegar
Cleaning the Pod Holder

Rinse the Pod Holder with Warm Water
After rinsing the pod holder with warm water, it’s important to ensure that all coffee residue and debris are removed. Gently shake the pod holder to dislodge any remaining coffee grounds. This step is crucial for maintaining the quality of your brews and extending the lifespan of your Keurig machine.
Next, inspect the pod holder for any leftover coffee grounds that may be stuck. If you find any, use a soft brush or cloth to gently wipe them away. Make sure to clean both the inside and outside of the pod holder, paying special attention to the area around the needle, as this is where coffee grounds are most likely to accumulate.
Use a Paperclip to Clean the Needles
After removing the pod holder, it’s time to address the Keurig needles, which often get clogged with coffee grounds. Locate the entrance needle by lifting the brewer’s handle; it’s found on the underside of the lid. Carefully straighten a paperclip and insert it into the needle’s holes. Gently wiggle the paperclip to dislodge any debris.
Next, focus on the exit needle located at the bottom of the pod holder. After detaching the funnel, use the paperclip to clear out any obstructions in the exit needle as well. Once both needles are cleaned, ensure to run a water-only brew cycle to flush out any remaining grounds.
Dry the Pod Holder Thoroughly
After rinsing, it’s crucial to dry the pod holder completely before reassembling your Keurig. Moisture left in the pod holder can lead to mold and bacteria growth, which is harmful to both your machine and your health.
- Gently shake off any excess water from the pod holder.
- Use a clean, dry cloth or paper towel to pat down all surfaces.
- Allow the pod holder to air dry for a few minutes to ensure all moisture has evaporated.
Once the pod holder is dry, you’re ready to move on to the next steps of reassembling your Keurig for another round of delicious, fresh coffee.
See Also: Keurig Add Water Light Not Working
Reassembling the Keurig After Cleaning

Reattach the Funnel to the Pod Holder
Once the pod holder and funnel are clean and dry, it’s time to reassemble them. Align the funnel with the pod holder, ensuring that it fits snugly. You’ll notice that the funnel only fits one way, so there’s no need to force it; it should click into place with a gentle push.
After securing the funnel, double-check that it is properly attached. A loose funnel can lead to brewing issues, so take a moment to ensure everything is fitted correctly. This simple step helps prevent any future complications during your coffee brewing process.
Insert the Pod Holder Back into the Machine
Once the pod holder is clean and dry, it’s time to put it back into your Keurig machine. Align the pod holder with the housing and gently press down until it clicks into place. This ensures that the holder is properly seated and ready for your next brew.
After reinserting the pod holder, it’s crucial to check that it is secure. A loose pod holder can lead to brewing issues. Simply give it a gentle tug to confirm that it’s locked in. With the pod holder in place, you’re one step closer to enjoying your next cup of coffee.
Perform a Water-Only Brew Cycle to Rinse
After reassembling your Keurig, it’s important to perform a water-only brew cycle. This will help to rinse any residual debris from the pod holder and needles, ensuring your next cup of coffee is as fresh and clean as possible.
Follow these simple steps to complete the process:
- Fill the water reservoir with fresh water, but do not insert a K-Cup.
- Lower the Keurig’s handle to close the head.
- Select the largest cup size to maximize the cleaning effect.
- Press the brew button to start the cycle.
Once the cycle is complete, your Keurig is ready for use. This final step helps to maintain the cleanliness of your machine and is a good practice to follow after each cleaning session.
Read Also: Keurig Descale Light Won’t Turn Off
Maintaining Your Keurig for Optimal Performance

Remove Used Pods After Each Brew
To maintain the quality and longevity of your Keurig machine, it’s essential to remove used pods after each brew. This simple habit prevents the growth of mold and bacteria, which can affect the taste of your coffee and the health of your machine. After brewing, allow the pod to cool briefly before disposal.
While removing the pod, take a moment to wipe away any coffee grounds that may have escaped. These grounds can accumulate over time, leading to clogs and affecting the performance of your Keurig. A quick wipe with a dry paper towel or a damp cloth can keep the pod holder clean and ensure it’s ready for your next cup of coffee.
Lastly, leaving the pod holder open to air dry after cleaning will help to minimize moisture buildup, which is a common cause of mold. By following these simple steps, you can enjoy a fresh, delicious cup of coffee every time you use your Keurig.
Regularly Descale Your Keurig
To ensure your Keurig continues to provide the perfect cup of coffee, descale your machine every 3 to 6 months. This process removes mineral build-up that can affect taste and overall machine performance. For descaling, you can use the Keurig\u00ae Descaling Solution or a homemade mixture of water and white vinegar in equal parts.
Follow these steps for descaling:
- Fill the water reservoir with your chosen descaling solution.
- Place a large mug on the drip tray.
- Press and hold the 8oz and 12oz buttons for 3 seconds.
- Start the descaling process by pressing the brew button.
- Continue until the “Add Water” light turns on.
- Finish with a freshwater rinse to remove any remaining descaling solution.
Regular maintenance, including descaling, will keep your coffee maker performing at its best, ensuring that every brew is just as satisfying as the last.
Inspect and Clean the Needles Periodically
To ensure your Keurig continues to provide the perfect cup of coffee, periodic inspection and cleaning of the needles is crucial. Over time, coffee grounds can accumulate and clog the needles, affecting the flavor and flow of your brews.
- Start by locating the entrance needle on the underside of the Keurig’s lid. Use a straightened paperclip to gently clear any obstructions from the holes.
- For the exit needle, found on the inside bottom of the K-Cup pod holder, repeat the process with the paperclip to remove any clogs.
After cleaning, it’s advisable to run a water-only brew cycle to ensure all loosened debris is flushed out. This simple maintenance step can prevent many common issues and extend the lifespan of your Keurig.
Read Also: Keurig Descale Reset
Conclusion
Maintaining your Keurig machine is essential for ensuring a delicious cup of coffee every time. By following the step-by-step guide on removing and cleaning the pod holder, you can prevent mold, bacteria growth, and clogs from coffee grounds.
Regularly removing used pods, cleaning the pod holder, and using a paperclip to clear the needles will keep your Keurig in top condition.
Remember to perform these maintenance tasks frequently to enjoy the full flavor and functionality of your Keurig coffee maker.
Frequently Asked Questions
How do I remove the pod holder from my Keurig?
To remove the pod holder, first ensure your Keurig is turned off and unplugged. Open the machine’s head to access the holder, then release it from the housing and separate the pod holder from the funnel.
Is it necessary to unplug the Keurig before removing the pod holder?
Yes, for safety reasons, you should always turn off and unplug your Keurig before attempting to remove the pod holder or perform any maintenance.
Can I clean the Keurig needles with a paperclip?
Yes, you can use a straightened paper clip to clean the entrance and exit needles of your Keurig. Insert it gently into both holes and move it around to loosen any coffee grounds, then run a water-only brew cycle.
How often should I clean my Keurig pod holder?
It’s recommended to clean the pod holder regularly, depending on your usage. After each brew, remove used pods and clean any grounds. Perform a deep cleaning monthly or as needed.
What should I do with used Keurig pods?
Remove used pods after each brew to prevent mold and bacteria growth. Let the pod cool down before tossing and wipe the holder with a dry paper towel or a damp cloth.
Why is it important to perform a water-only brew cycle after cleaning?
Performing a water-only brew cycle after cleaning ensures that any debris or cleaning agents are rinsed out, and it helps to verify that the needles and pod holder are clear of obstructions.
You may read also: